Social Icons

Pages

Showing posts with label how-to. Show all posts

Sunday, May 25, 2014

Decorative fabric wrist cuff/ bracelet tutorial


Spring and summer is the best time to show your pretty handmade accessories, especially the ones made of fabric, threads and cutest little buttons. Just one interesting piece might take care of the rest of your outfit!

We 
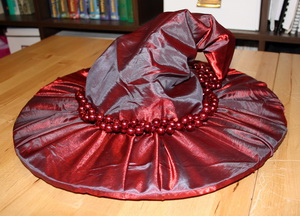
loved this fabric wrist cuff tutorial from Owlweaver shop on Etsy for a lovely look and detailed instructions. Yulia, the author of this project is kindly sharing the step-by-step instructions with us today. 
https://www.etsy.com/listing/180491640/cuff-lace-bracelet-with-beads-for-her?ref=shop_home_active_9
 Materials you will need:
1. Main fabric, fusible web & backing fabric. You can dye white fabric in a coffee to get an antique/vintage look.
2. Brads, gems (stones), beads and other decoration stuff you want to see on your future bracelet.
3. Different kind of ribbons or lace - whatever your heart desires.
4. Fishing line (not necessary, you may use a simple thread – it is for beads, stones and I sew a back side with the help of fishing line)
5. Buttons and elastic cord for buttons loops, approx. 2mm wide.
6. Sewing machine, threads, needle and other sewing accessories.
7. Pencil, ruler and paper for C.

The process:
1. First, we have to make a sewing template and use it to cut a fabric. The circumference of my wrist is 16,5cm and I want my cuff to be 11,5 cm wide, so the top of a cuff it’s supposed to be not less than 22cm. The measurements of the trapezoid template I’ve used were 25.5cm(top of cuff), 19.5cm (bottom of cuff) and 12.5 cm high.
Then fuse two pieces of fabric together by ironing if the fabric is thin. Make sure you have placed the adhesive side toward the back side of the fabric. Cut the main and backing fabric using template.
2. Prepare ribbons, ruffles and lace that you are going to use as well as other accessories.

3. Work out edges of the main and back fabric with zig-zag stitch.
4. 1st "tier". Choose the widest lace, which will be placed near the wrist and ruffle it. First I tack, then sew it on a sewing machine.
5. 2nd “tier “- pinned on the top of the 1st "tier" strips of tulle (I like to use it, it good separate layers or "tiers" of lace).  
6. If you don’t have initial design just use your intuition and inspiration and everything comes up spontaneously. The next “tier” is crinkled decorative elastic band. I stitched up to the middle and then I decided to make a flower. You can do the same or just continue sewing a layers (“tiers”). It may be pieces of fabric (it looks good when you tearing fabric, don’t cut with scissors).

7. Continue decorating the foundation until you’ll receive a desire result.


Next, make a button loops (1):
2.  Attach the elastic cord on the one side of the bracelet.
3. Tack in a lining to the front side of the bracelet. Put a back side fabric a little bit lower in the direction to the lace. Stitch using machine three sides of your bracelet (except the side with the lace) .

4. Turn out the bracelet, iron it on all sides.
5. The lining part turn inside and stitch with the blind stitch with the thread or fishing line like in my case. 
6. And the final item! You have to sew buttons and, congratulation, your bracelet is ready!
Have a great summer and thank you for your attention!
 ............

Yulia has just started on her new blog so we are expecting more wonderful tutorials from her!

Friday, December 20, 2013

Holiday coasters with crochet snowflakes DIY


This wonderful idea came from Katrin katrinshine who has been crocheting snowflakes for many years. The combination of red felt and white thread are making these coasters so festive!
http://www.etsy.com/shop/katrinshine
To make the coasters like these you will need:

Red felt
white crochet thread #8 or 10
a hook
fabric glue
scissors

First crochet your snowflakes (make as many as you need). You can use the pattern Katrin used or use your own if you'd like:
If you need some help with how-to crochet the Katrin's snowflake here it is:
 Block your snowflakes. It's not necessary to use starch.
Make a hexagon pattern and cut the hexagons out of the red felt.
Glue the snowflake to the felt and place it under a heavy book to press it for a couple of hours. If you prefer the embroidery simply stitch the snowflake to the felt.
This project is very easy and the result is great. Happy holidays, everyone and have fun decorating your home!
http://www.etsy.com/shop/katrinshine

Monday, April 30, 2012

A card for your mother

Today Alisa from GraphicMarket shop on Etsy is sharing great story and ideas for making a greeting card.

We all have our own little traditions, the way we do things – my personal little obsession is card making. Christmas Cards, greeting cards for birthdays, thank-you cards and so on. Of course we never have time for such things, but the process can be so relaxing that you can make cards for half a year ahead just in one go.

Lot’s of my friends told me that they are waiting every year for my Christmas card to arrive. It was so sweet when I realized that people are keeping my cards, they don’t throw them away! It makes my hobby very special.

Here you can see my latest creations that will suit perfectly mother’s day theme.

For this project you will need:
 - Thick cardboard (I used watercolor paper)
 - Ink (or a felt pen)
 - Ribbons (preferably 2 shades and 2 different width)
 - Glue (any paper glue will do, but I prefer to use double sided tape, it creates less mess)
 - Printable digital paper or digital collage sheet – that’s my favorite! This magic stuff turns any card into a masterpiece! Try to find 2 matching patterned papers, just like I did – polka dot and flower pattern – they work well together) I used a usual printer to print the patterns on A4 format thick paper.

That's probably all we will need. :)

For your cards you can try the ideas on the photos. At fist glance it seems you really need to have some drawing skills, but look again and you’ll notice that the best cards that I made are dead simple!

For example little cute dress on the drying line – easy to make and it’s such a cutie! Or hearts in the shapes of balloons – that’s another great idea for you – be creative and be confident – you’ll get it right)

Tips:
  • Simplicity is the key! Keep it simple, keep it fresh and don’t clutter all you scrap booking elements on one card. Even if you put just one shape out of scrap booking paper (a heart for example) and write a name of the recipient underneath it will look stylish and elegant
  • Have a color scheme. 1-2 colors that work together will look better than a rainbow of all your favorite colors together
  • Add personal touches – even if it’s just a hand written message or doodles around the edge – it will help your card to stand out and will show the recipient your true affection.
  • Ribbons and bows are simple but very effective tool in card making - they are cute and they add 3D to your card. (The easy way to attach the ribbon, when you’re using it horizontally, is to make a little cut at the side of the card, thread the ribbon through the hole and glue both ends of the ribbon inside the card – you’ll get clean ends of the ribbon and no glue on the front of the postcard) 
You can find lot’s of cute scrapbooking materials in my shop (GraphicMarket) so next time you are thinking about card making or just need a background for your website, please stop by.

I highly recommend card making as a hobby. Scrapbook collages made it so simple and enjoyable. Just try to make a card yourself next time you’re invited for a birthday party or mother’s day!

Lot’s of my friends told me that they are waiting every year for my Christmas card to arrive , it was so sweet when I realised that people are keeping my cards, they don’t through them away – it makes my hobby very special.

Be creative and have fun!

With love,
Alisa (GraphicMarket)

Monday, April 23, 2012

How to make a simple teething ring pendant crochet necklace


This teething pendant made by Jana (nihamaj) might be a perfect gift for a new mom and for a little one. It will work perfect to keep little hands busy and not pinching while nursing.


 You will need:

 Fabric yarn. I use baby or organic cotton because babies like to taste it.

Wooden ring.

Scissors

One bead. I use wooden beads, but you can use stone or plastic bead. If you use plastic, be sure that it is safe and the paint does not peel off !

Tape measure

Crochet hook 


Crochet a simple chain about 35"/ 90 cm long. 


Fold it in half and insert the folded end into the ring. 

 Slip the other two ends through the loop made by the fold and tighten it. 

Slip the bead down to the ring and tie a knot above the bead to hold it in place. 


 Then tie a knot with the two loose ends to connect them into a necklace. 

Your pendant is ready. You can wear it short or long by adjusting the knot on the ends.  

By Jana (nihamaj)

Monday, November 7, 2011

Leather pendant how-to

You can make a beautiful and stylish pendant with your own hands. It's easy if you'll follow this tutorial from Katrinshine


You will need:
a.. A piece of genuine leather 1/32" to 1/16" thick
b..A thick needle or an awl
c. Scissors
d. A drafting compass
e. Flat nose pliers
f. A charm
g. A ring 1/4" to 1/2" in diameter
h. A chain with lobster clasp closure (or a cord)

1. Draw 2 identical circles on the back side of the leather, cut them out. It has to look like this:


2. Join the edges as shown. Sew circles together keeping the distance of 1/8" from the edge. If the edge of one of the circles overhangs, trim it with scissors.

3. Pierce circles once with a thick needle a little more than 1/8" from the edge, a little further in than the seam. Pass the ring through the opening.

4. Take a charm and put it on the ring. Close the ring with flat nose pliers.

5. Pass the chain (or cord) through the ring.

Monday, October 24, 2011

Halloween hat DIY

This lovely hat might be exactly what you need for your fun Halloween Party! Svetlana from NESJewelry will show you how to make this! 


You will need
1.      a sheet of thick cardboard or .5 inch-thick sheet of Styrofoam
2.      an umbrella you do not need
3.      thick fabric such (old jeans will do)
4.      scissors, thread, needles, pins, sewing machine, exacto knife
5.      a cat :)

First, draw 2 concentric circles with diameters of 4 and 8 inches on the cardboard sheet. Cut out a doughnut shape using exacto knife.

Remove fabric off umbrella and cut off two sectors.

Cut the same "2-sector" shape out of your thick fabric (jeans). Fold that thick-fabric shape in two and sew it into a cone - it will be used as the centerpiece of the hat.

We will use the remaining sectors of umbrella fabric for the hat's brim.

We will need to remove all the corners first so the outer edge looks like a circle.

Then cut off extra fabric from the central part so you have strip 10 inches wide in a shape of a curve. Sew together the edges of the strip so it makes a circle (sort of).

Thread the narrower edge of the circle so its width matches the bottom of the cone and sew them together by folding the fabric face to face and then stitching through. Insert the thick-fabric cone into the hat and attach lightly with thread.


Pin the underside of the hat to the cardboard doughnut and turn the fabric over while gathering it and pinning it up to the cardboard.

You will need to pin it so the fabric completely covers the cardboard and meets the seam where the cone was attached to the brim thread the fabric to make sure you have gathered it uniformly and hand-sew it together.

  Now your hat looks like this!

Thread the cone along the seam so we can gather it a bit to make the tip of the hat crooked. And that completes our effort - the hat can be worn now! 
Of course, you can add some beads
  or flowers
or ribbons
 or whatever decorations your heart desires!

Tutorial by Svetlana NESJewelry
Translated by Alla FleetingStillness
Related Posts Plugin for WordPress, Blogger...