Social Icons

Pages

Showing posts with label freebie on Monday. Show all posts

Tuesday, October 22, 2013

Kawaii Angel to cross stitch

Season of sharing and giving is coming and we are all looking for one of a kind gift to give to our friends and family. So why not make it yourself?
If you like to stitch, this little Angel from LaMariacha shop on Etsy can be a wonderful gift idea.

Your finished chart will look great on a wall or on a sofa pillow. You can decorate a handbag with it or IPad case. Use your imagination and your gift will be truly one of a kind!
 

There are many more ideas to cross stitch at Mariya's shop so please stop by!

Monday, January 30, 2012

Recycled coasters DIY


Coasters are a great way to protect your furniture from scratches or those ugly water rings made by drink glasses and coffee mugs. Use leftover materials you used for some other projects and you will make one more step to saving the planet!


These double sided coasters were made by Albina (GoodWeather) from an old sweater which was previously washed and felted. The main part of sweater was used to make the protective covers for electronic gadgets and the rest of it got a new purpose now!

To make coasters like these you will need:

- Felted pieces not smaller than 5" across
- Scissors
- Sewing machine with thread
- Steam iron

1. Cut out circles with your scissors, 4" in diameter. Make twice more circles than coasters needed (i.e. for 6 coasters cut out 12 circles):

2. Arrange circles in pairs putting one on top of another:

3. You may want to pin the circles in place. Using either simple or zigzag stitch, sew the edges together:


4. Using zigzag or another decorative stitch, sew through the center:


5. If you desire, make another stitch perpendicular to the previous stitch:

6. Your coaster may look a little"wavy" like this:
 7. Steam iron your coasters so they look nice and flat.

Happy crafting!


Monday, January 23, 2012

Lampwork bead tutorial

There are a lot of different types of crafts and arts represented in Russian team on Etsy. Some categories are saturated enough, some are not. But the category that represent Katya from MayaHoney on Etsy is not saturated at all. I would say Katya is a unique artists so far in our team who makes lampwork.


Today, she is sharing a tutorial how to make a heart on lampwork bead.


Monday, January 16, 2012

Valentine crochet coasters

Are you ready for your Valentine crafts? If you love to crochet these lovely coasters from Adina (daisiescrochet) are a great idea for you!

Heart shaped Coasters.

Skill Level: Easy

SIZE: 3 ½” x 3 ¾” (9 x 10)

CROCHET HOOK
I – 5.5 mm crochet hook or size to obtain correct gauge.

ABBREVIATIONS
ch – chain
sl st – slip stitch
beg – beginning
sc – single crochet
hdc – half double crochet
dc – double crochet

MATERIALS
For 1 coaster needs: 10yds Sugar and Cream Cotton (120yd/109m – 2.5oz/70.9g) Worsted /4ply or any other blend of similar yardage yarn.

Visit my blog to learn how to crochet dc decrease and more.
daisiescrochet.blogspot.com/

NOTE: The hearts is worked in rounds.

Start ch3, join with sl st in first ch to form a ring.

Rnd 1: ch1, work 11sc in ring, join with sl st to beg ch1.
Rnd 2: Ch1, sc and hdc in 1st ct, 2dc in next 4 cts, 5dc in next st, 2dc in next 4 sts, hdc and sc in last st, join with sl st to beg ch1.
Rnd 3: Ch1, st in next 2 sts, sc and hdc in next st, 2dc in next 3 sts, dc in next 5 sts, 5dc in next st, dc in next 5 sts, 2 dc in next 3 sts, hdc and sc in next st, st in last 2 sts, join with sl st to beg ch1.

Edging:
Take contrast yarn.
Join yarn with sl st in first st. Sc in all sts around.
Fasten off.

Happy Crocheting!!
All rights to this pattern are owned by Daisies Crochet.

Please, no resale, copy, forward or distribution of this pattern allowed, and no resale of items made using this pattern is allowed. This is for personal use only. Thank you for understanding.

Monday, December 5, 2011

Christmas printable gift tags

December has began, and it means that Christmas season officially started. Now, it's time to take care about Christmas gifts and home decoration. We all know that the time is a little bit stressful because we are all looking for perfect gifts. Well... let us bring small detail that will make you a little bit less under pressure this holiday season. :) Gift tags... They will be really useful when all gifts are ready and wrapped.

Christmas printable gift tags from GraphicLand
Irina from GraphicLand shop on Etsy is sharing Christmas printable gift tags. You need simply download them, print, cut, and attach to you gifts. They are not simply tags; they should be folded. So they will look like tiny note cards where you can write some holiday wishes. :)

Christmas printable gift tags from GraphicLand
The gift tags are available to download there. The digital collage sheet is 8.5x11 inches that is standard letter size with resolution 300 dpi. They may be printed on home printer. For better result, we would recommend to print them on laser printer on 60-80 lb heavy paper.

Christmas printable gift tags from GraphicLandIf the link doesn't work, please leave a comment, and we'll fix it. And don't forget to come and download the file :)

Please, look at more Christmas designs in GraphicLand shop on Etsy.

Please, keep in mind that the Cristmas printable gift tags are for personal use and can not be sold in printed or digital form.

Monday, November 28, 2011

Gift box DIY

Hi!

My name is Natalka, and I'm running Etsy shop Skrynka. Today I want to show you how to make a beautiful but durable boxes for your Christmas gifts.


Recently I've made a few Christmas cross stitch ornaments. I needed durable yet beautiful boxes to ship them to my international customers. So I've made square boxes from old carton boxes and wrapping paper and this is how.


First of all, you need to measure your gift.
I needed to make a 5-inch square boxes that were 1 inch tall and the lids for them. The lid has to be a bit larger, so it is a 5 1/8-inch-square box that is also 1 inch tall.

Now we must calculate the size of wrapping paper. The paper will be square in shape. And here is the formula to calculate the side of the square:

1.4* (side of the box + 2*height of the box)

So, the size of my wrapping paper square is 1.4* (5 + 2) = 1.4 * 7 = 9.9 inches.

I rounded up and used a 10" x 10" squares of wrapping paper to wrap my boxes.


Fold the corners inside.
Before placing my bottom box onto the wrapping paper square I attach 2-sided adhesive tape to fix it in place.

Then I put it on and fold all 4 sides of the box.

Than I glue central square.
And fold 2 of corners again.
Then I fold the excess paper inside the box just like on the photo below.


And fold another 2 corners.
The bottom of the box is ready.

Repeat all steps with another wrapping paper square and the lid and our box is ready!


Using my formula you can make the square box any size with your favorite wrapping paper.

Happy holidays!

By Natalka Skrynka.

Monday, November 14, 2011

Free digital printable placement cards for thanksgiving

Thanksgiving is soon, and we all are trying to get ready for this holiday. Probably, you already have in mind with the meal that you are going to cook. Also, decoration is already prepared... But let us share a small final touch that you can add to your home decoration. Placement cards!

Free digital printable placement cards for thanksgiving
Today, Irina from GraphicLand shop on Etsy is sharing 4 cute printable placement cards for your Thanksgiving table. Or just for any fall-themed party.

You can download the digital collage sheet there. For better result, we'd recommend to print on laser printer on heavy paper like 80-100 lb. The collage sheet is designed to be printed on standard letter size 8,5x11 inch with resolution 300 dpi.

Free digital printable placement cards for thanksgiving
So you need simply download, print, write a name on the card, and cut it out.


Than, fold it as shown on pictures below.

Free digital printable placement cards for thanksgiving
Than, make two similar cuts on the folded edges. Just keep the parts together and make the cuts.

Free digital printable placement cards for thanksgiving
Make them wide to fit an edge of a plate

Free digital printable placement cards for thanksgiving
And place them on the plate's edge. Easy!

Please, keep in mind that the shared graphics are for personal use only.

Enjoy!

Monday, November 7, 2011

Leather pendant how-to

You can make a beautiful and stylish pendant with your own hands. It's easy if you'll follow this tutorial from Katrinshine


You will need:
a.. A piece of genuine leather 1/32" to 1/16" thick
b..A thick needle or an awl
c. Scissors
d. A drafting compass
e. Flat nose pliers
f. A charm
g. A ring 1/4" to 1/2" in diameter
h. A chain with lobster clasp closure (or a cord)

1. Draw 2 identical circles on the back side of the leather, cut them out. It has to look like this:


2. Join the edges as shown. Sew circles together keeping the distance of 1/8" from the edge. If the edge of one of the circles overhangs, trim it with scissors.

3. Pierce circles once with a thick needle a little more than 1/8" from the edge, a little further in than the seam. Pass the ring through the opening.

4. Take a charm and put it on the ring. Close the ring with flat nose pliers.

5. Pass the chain (or cord) through the ring.

Sunday, October 30, 2011

Felted balls DIY

Every child likes to play with balls. There should be a lot of them in different colors, sizes and made from the different materials like plastic, wood or textile. 

How about a felted wool balls for your home decor? Let's make it together with Oksana from LaFiabaRussa shop on Etsy!

You will need:

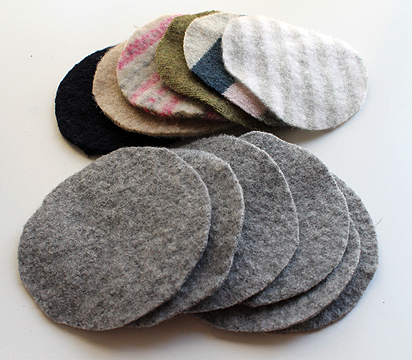
100% wool yarn, new or recycled from old sweaters
one or two unexpensive nylon pantyhose (leg portion only),
a pair of your old jeans
string or cord,
washing machine

Roll the yarn into balls (we are using 100% wool only for this project. Non wool yarn will not felt). 

Now it is ready for a cycle of intensive wash. Stuff them one at a time into the legs of the pantyhose and tie a cord in between the balls.
 Continue this way until all of your balls are inside.

Toss your filled pantyhose into a washing machine on a short hot cycle together with a pair of your old jeans to help the process of felting.

Check your balls, they should be fulled into balls but they are still soft! 

So it's time to embellish them with colorful threads or wool appliqué.

Return your balls to a washing machine for further fulling. Repeat the process of washing on a spin cycle in hot soapy water. Use as little water as possible to help the balls bounce together more.

If the balls still feels too soft after the first cycle run it again.

When the balls are tight enough switch the setting to rinse and add a big towel to hold your balls in place as they spin.

Ready!

For a couple days dry your balls out in warm place with lots of air circulation.

So, here they are, bright, warm, soft and safe for your furniture! Just don’t be surprised if your new felted balls will be a hit with your kids and pets!


Related Posts Plugin for WordPress, Blogger...