Today, Natalia from
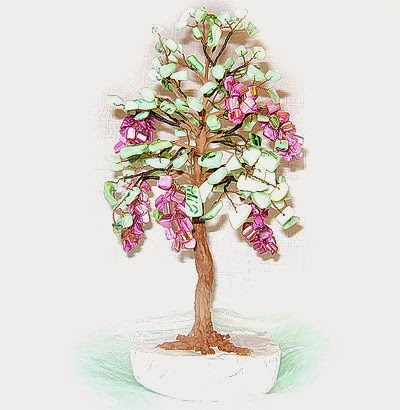
NataliaDecor shop on Etsy is sharing a great tutorial how to make a bonsai tree of mother-of-pearl beads and wire. This wonderful tree will be a great piece of decoration for almost every house.
Natalia lives in Bulgaria and makes lots of pretty things using decoupage and other techniques. She also makes these adorable little trees made with wire and beads. All these items are perfect for gift giving so please stop by her shop to see if you might need anything for your perfect gift for many occasions.
Now, lets make a tree.
Materials that are needed:
- Mother-of-pearl or other matching gems, 2-3 threads, each 30-32 inches long (80 cm) (number of those depends on the expected size of the tree)
- Copper wire, 0.012” thick (0.3mm)
- Copper wire, 0.07-0.09” thick (1.8 - 2.2 mm)
- Wire 0.12-0.20” thick (3-5mm)
- Cotton embroidery thread (brown or black)
- Plaster/Gypsum
- PVA adhesive
- Brown acrylic paint and acrylic finish
First of all, we need to make small tree brunches as shown:
After they are ready, we need to put them together in bunches. Branches will be heavy, so we need to reinforce them using 0.07-0.09” thick wire, as it is shown on the picture.
Next step is to make branches with 3 gems. Green gems and 0.012” thick copper wire are used at this step.
Bundle up these branches (3-5 in a bunch), randomly add pink branches and connect those using embroidery threads. You also could use tape, but in my opinion it looks neater with a thread.
Our branches are ready! Now build the crown of your tree with the branches you made earlier. Use 0.12-0.20” thick wire. Once the crown is ready, make sure that you still have 3-4” of wire left for the body of the tree. On the bottom of it make a loop. This would help you keep the tree steady.
It is time to plant the tree. Prepare an empty container (ice cream bucket, etc). Put empty plastic bag in it. Mix plaster with water. Put the tree in the container, make sure that it is steady and fill the container with plaster mix. Wait until gypsum mix is dry, and pull the tree out.
Now, it is time to build body of the tree. Mix 1 tablespoon of plaster with 1 tablespoon of PVA glue. Apply the mix using brush. First apply on branches. Once done with branches apply the mix on the body of the tree. Body of the tree must be covered more heavily with a gypsum mix.
While the plaster is not completely dry, using something sharp draw lines along the body to imitate patterns of the bark on the trees. When satisfied, let the gypsum dry.
Paint branches, body and base of the tree using brown acrylic paint. Wait until paint is dry. Coat body and branches using acrylic finish. Now it is time to decorate the base. I have used mix of regular sand and PVA adhesive. You can use turf cover, beads, stones or any other material of your choice.
You tree is ready. Enjoy!
By Natalia (NataliaDecor)
Translated by Gafa (MulberryTerrace)


7 comments:
Gorgeous tree and great tutorial!
Wonderful tutorial! Thank you!
Great teamwork! Thanks for the tutorial!
great!thank you!
This is great !
Great tutorial! Thank you for sharing it :)
oh! gorgeous. Always wanted to make my own bead tree, thank you for DIY
Post a Comment