Social Icons

Pages

Showing posts with label free tutorial. Show all posts

Thursday, October 29, 2015

How to make a felted ghost for Halloween

Some of us will most probably decorate our homes for Halloween. I would like to share an idea of a DIY project of making felted ghosts for Halloween.


We will need white and black felting wool, a glass to use as a form, soap, water and a piece of bubbled wrap paper.


On a piece of bubbled wrap paper put an empty glass upside down. Slowly start to cover it with white wool. It makes sense to water the surface of the glass beforehand so that our pieces of wool could stick to it. Once the glass is all covered with wool it's time to wet our wool with soapy water. It makes sense to water it slowly so that our wool doesn't fall off the glass and stays there covering it nicely. Once white wool is wet we can start making our ghost's "face".


With a piece of black wool make an eye and attach it to our white ghost. It's much fun to experiment with sized and eye position as our ghost's face expression will change dramatically depending on what shape and size ghost's eyes will be.

Once all the wool pieces are at place we can start the felting process. Carefully wrap bubbled paper around our glass and start rubbing it. Be gentle so that our wool doesn't fall off the glass. Once wool fibers become inseparable and our white form turns into a firm piece of felted wool it's time to rinse it.

To dry it well I let it sit on a glass overnight. Thus, the original form of the glass will be preserved and whet our ghost is nice and dry it will stay firm and round. I've attached a thread on top of it so that I could hang it anywhere in my room or outside. My little white ghost turned out to be not scary at all. But it's all in your own hands. Designing the ghosts face is the most creative part of the whole process!


Story By Tonya (CityCrochet)

Thursday, September 11, 2014

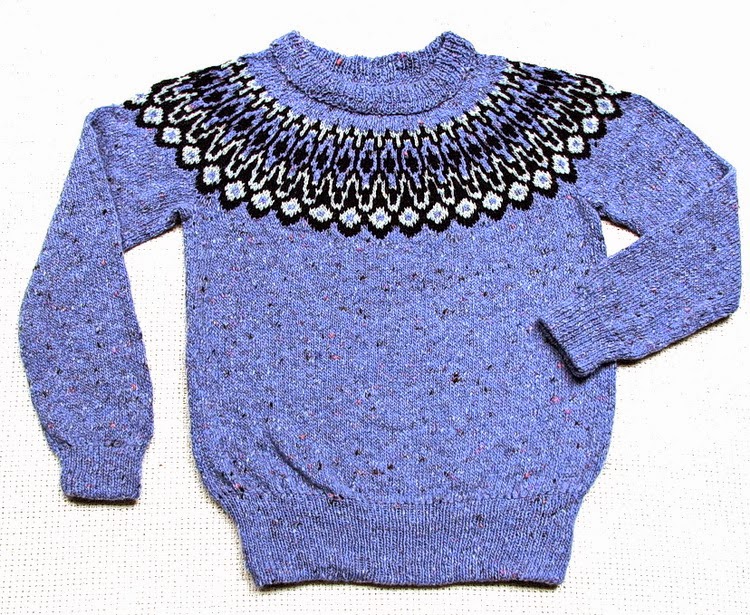
Machine knitting, seamless sweater


Fall is here and we are all getting ready for the holiday seasons. If you love to knit and have a knitting machine, this knitted sweater might be exactly what you need to make for someone you love. Lyudmila from woolsolution made one for her shop and shared how to make it with us.
https://www.etsy.com/transaction/226519754?
This article is NOT a pattern description and is intended to help knitters with some experience to save time and speed up knitting process.  This technique is suitable for some adult knitwear and works great for children’s sweaters, cardigans and vests. As a result the garment is seamless and provides comfortable fit.

If you have a knitting machine with a ribber attachment check the manual for tubular knitting.

Before starting the project knit a swatch and do all necessary calculations. Set up the carriage to knit fabric clockwise and use a waste yarn to cast on EON (Every Other Needle).

You will knit front when carriage  moves from right to left and back of the garment when carriage moves from left to right. Keep in mind that a row counter at the end should show required number of rows times fore for mock ribbing and times two for the rest part.  When you reach  required depth of mock rib  (Number of Rows times 4) bring all needles into work and continue knit clockwise to reach required rows for front/back.

Sleeves
With all mentioned above considerations  work each sleeve at a time increasing one stitch in every 8-10th row on one side.
Machine part is over. Now combine stitches on a circular needles skipping 8 or 10 (4-5 sts on both sides of the imaginary seams)  stitches in under arm area on sleeves and the body of the future sweater. Continue knitting forming raglan or round yoke and bind off at neck line.

This color schema includes stitches decrease instructions. Before start yoke make sure your number of stitches is dividable by 8 in order to get whole number of the given motif.


Related Posts Plugin for WordPress, Blogger...